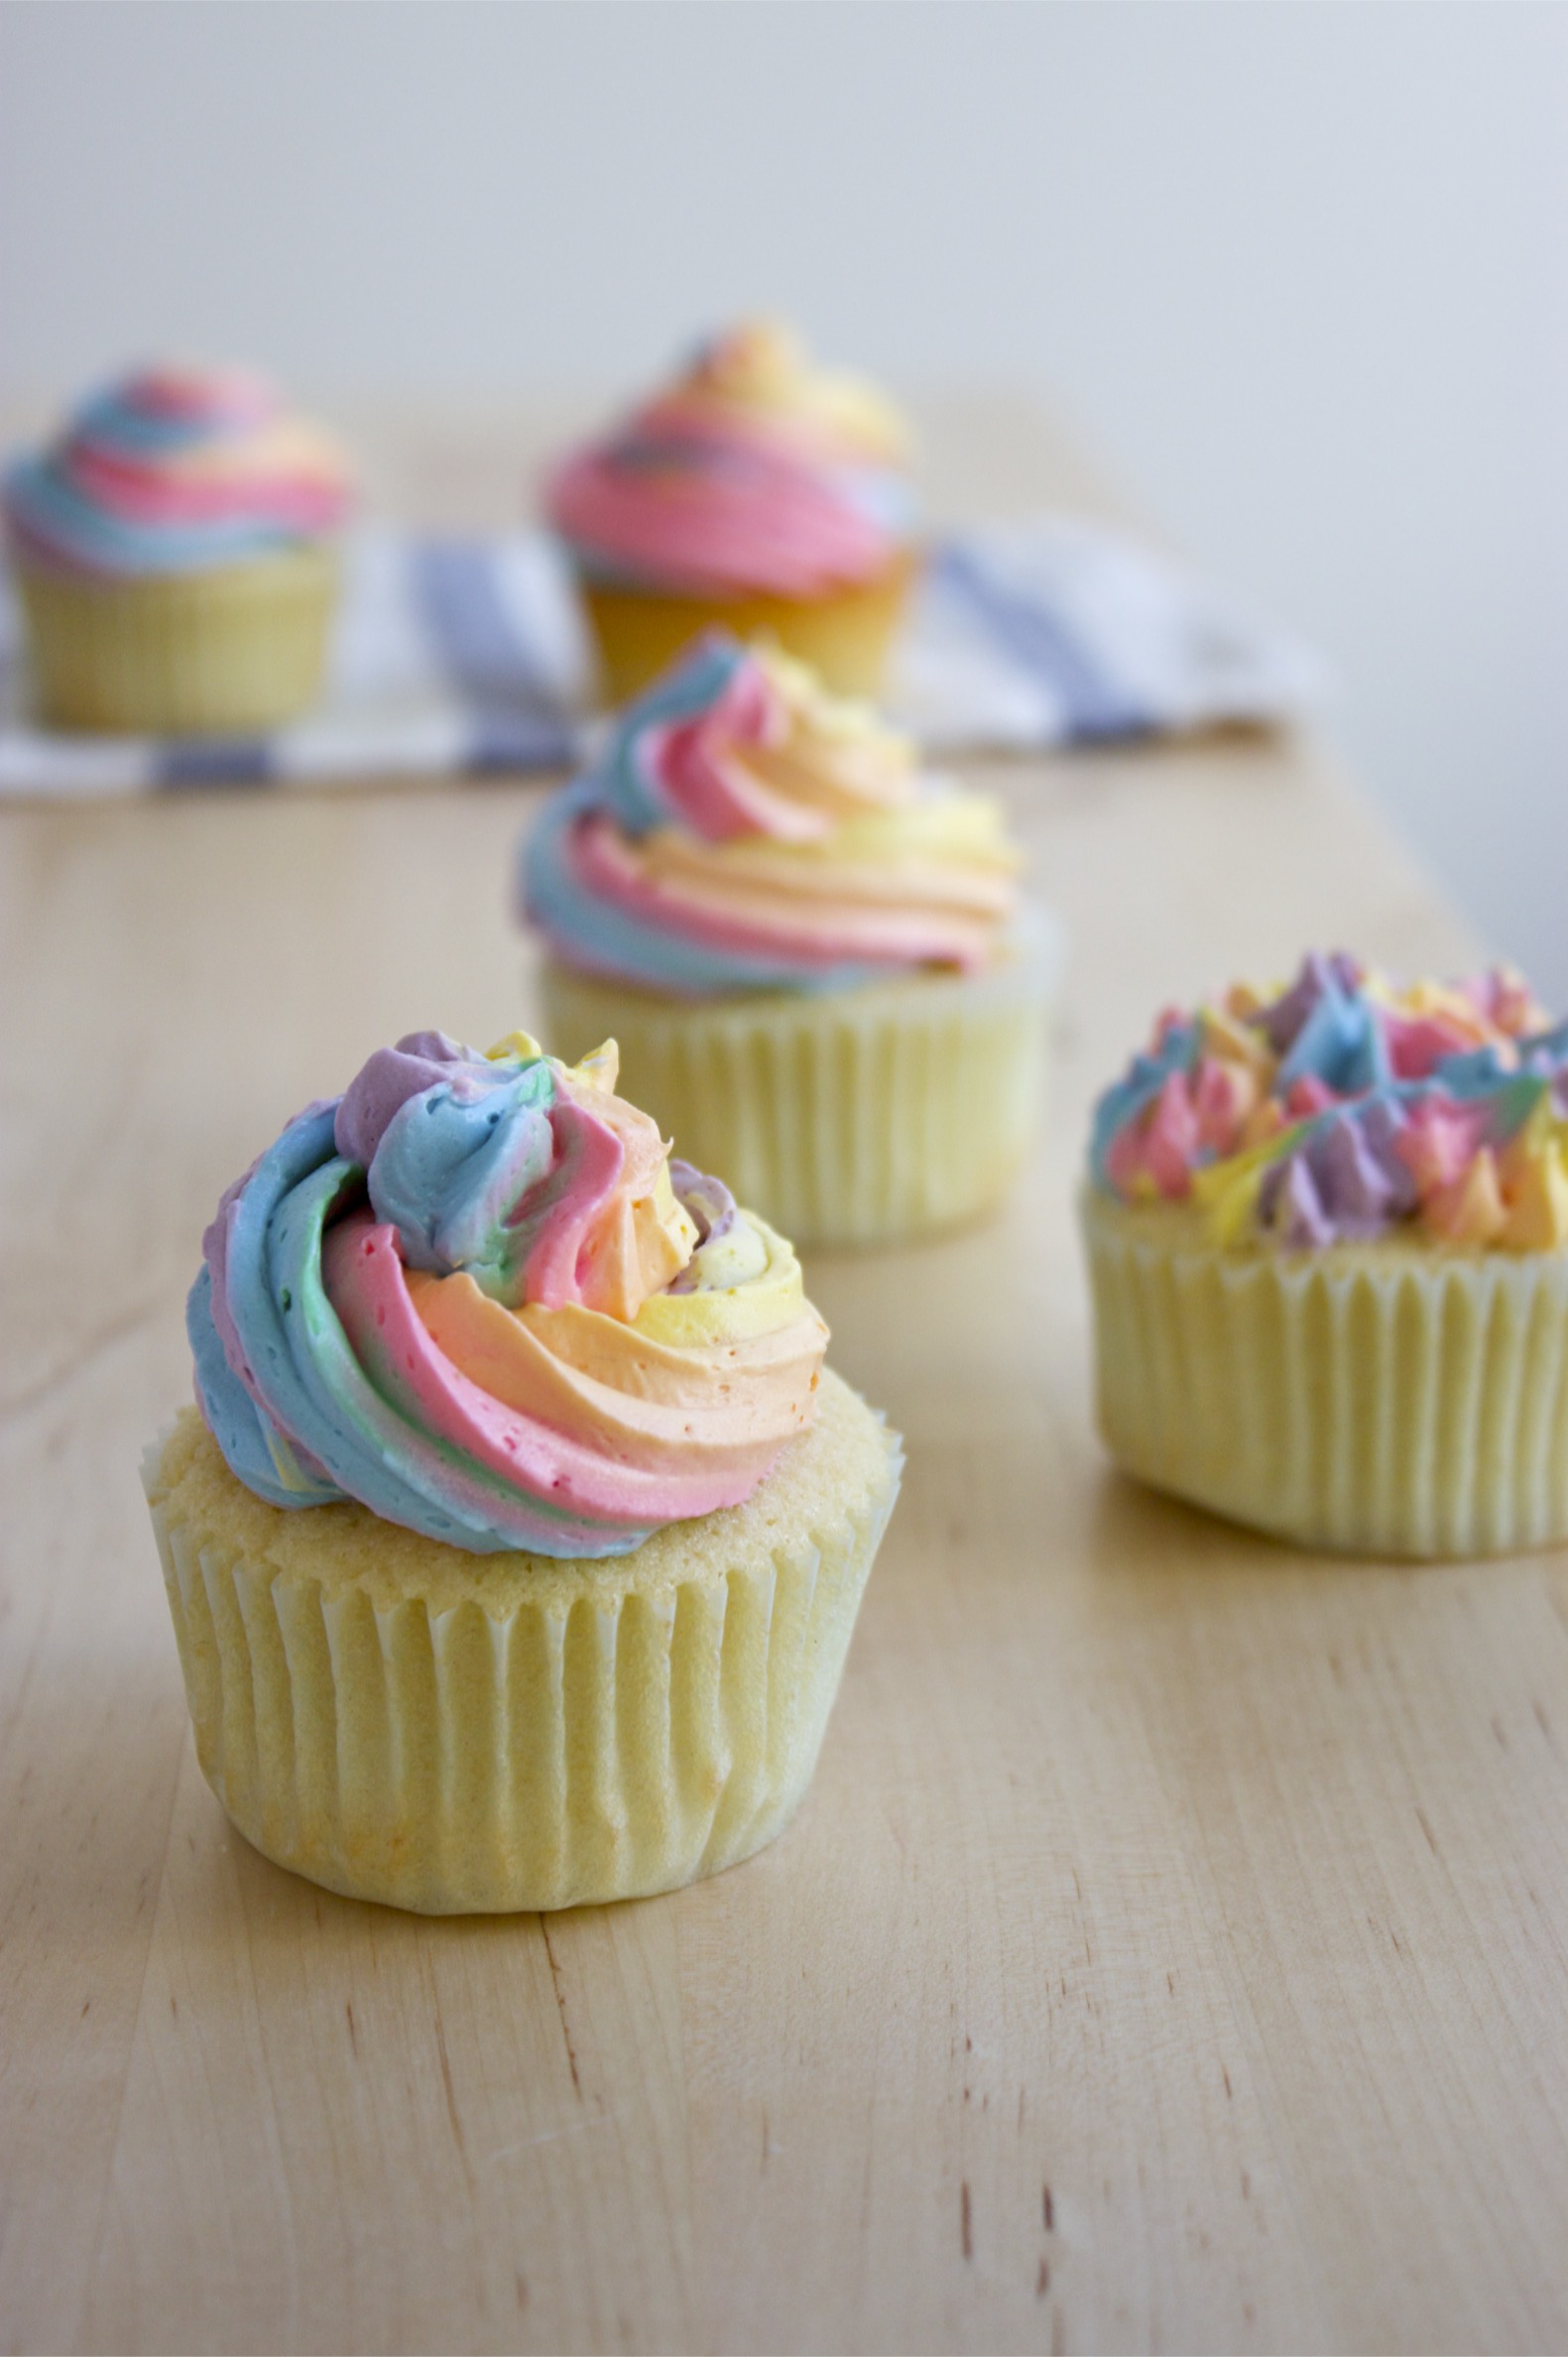
End of the Rainbow Cupcakes
Last week was my birthday. The night before, as my hubby was bringing my sweet little boy to bed he turned and said to me, “Happy Birthday Cake Mommy!” I knew in that moment I wasn’t going to get away without making a cake. How could I after such sweetness?
Other years I’ve happily made a cake for myself because my guys birthdays are in the summer and waiting the whole year before making a cake seems entirely too long. But, now that my baby girl was born in the dead of winter she kind of solved that problem.
I don’t know about you but I get much more excited about cooking and baking for other people. Dreaming and scheming up something for myself just feels… strange. But, I didn’t want to let my little sonny down. He gets so excited about birthdays and I knew he was going to want to help.
Then I remembered that St. Patrick’s Day was coming up and although I normally don’t make anything special for that day, I thought it would be fun to bake some cupcakes with a little nod to the old tale of a pot o’ gold at then end of the rainbow. I remember being fascinated about that idea as a child and it always frustrated me that try as you might it never seemed possible to find the end of the rainbow. It seemed like the perfect whimsical treat to bake up with my son in celebration of not growing up too much.
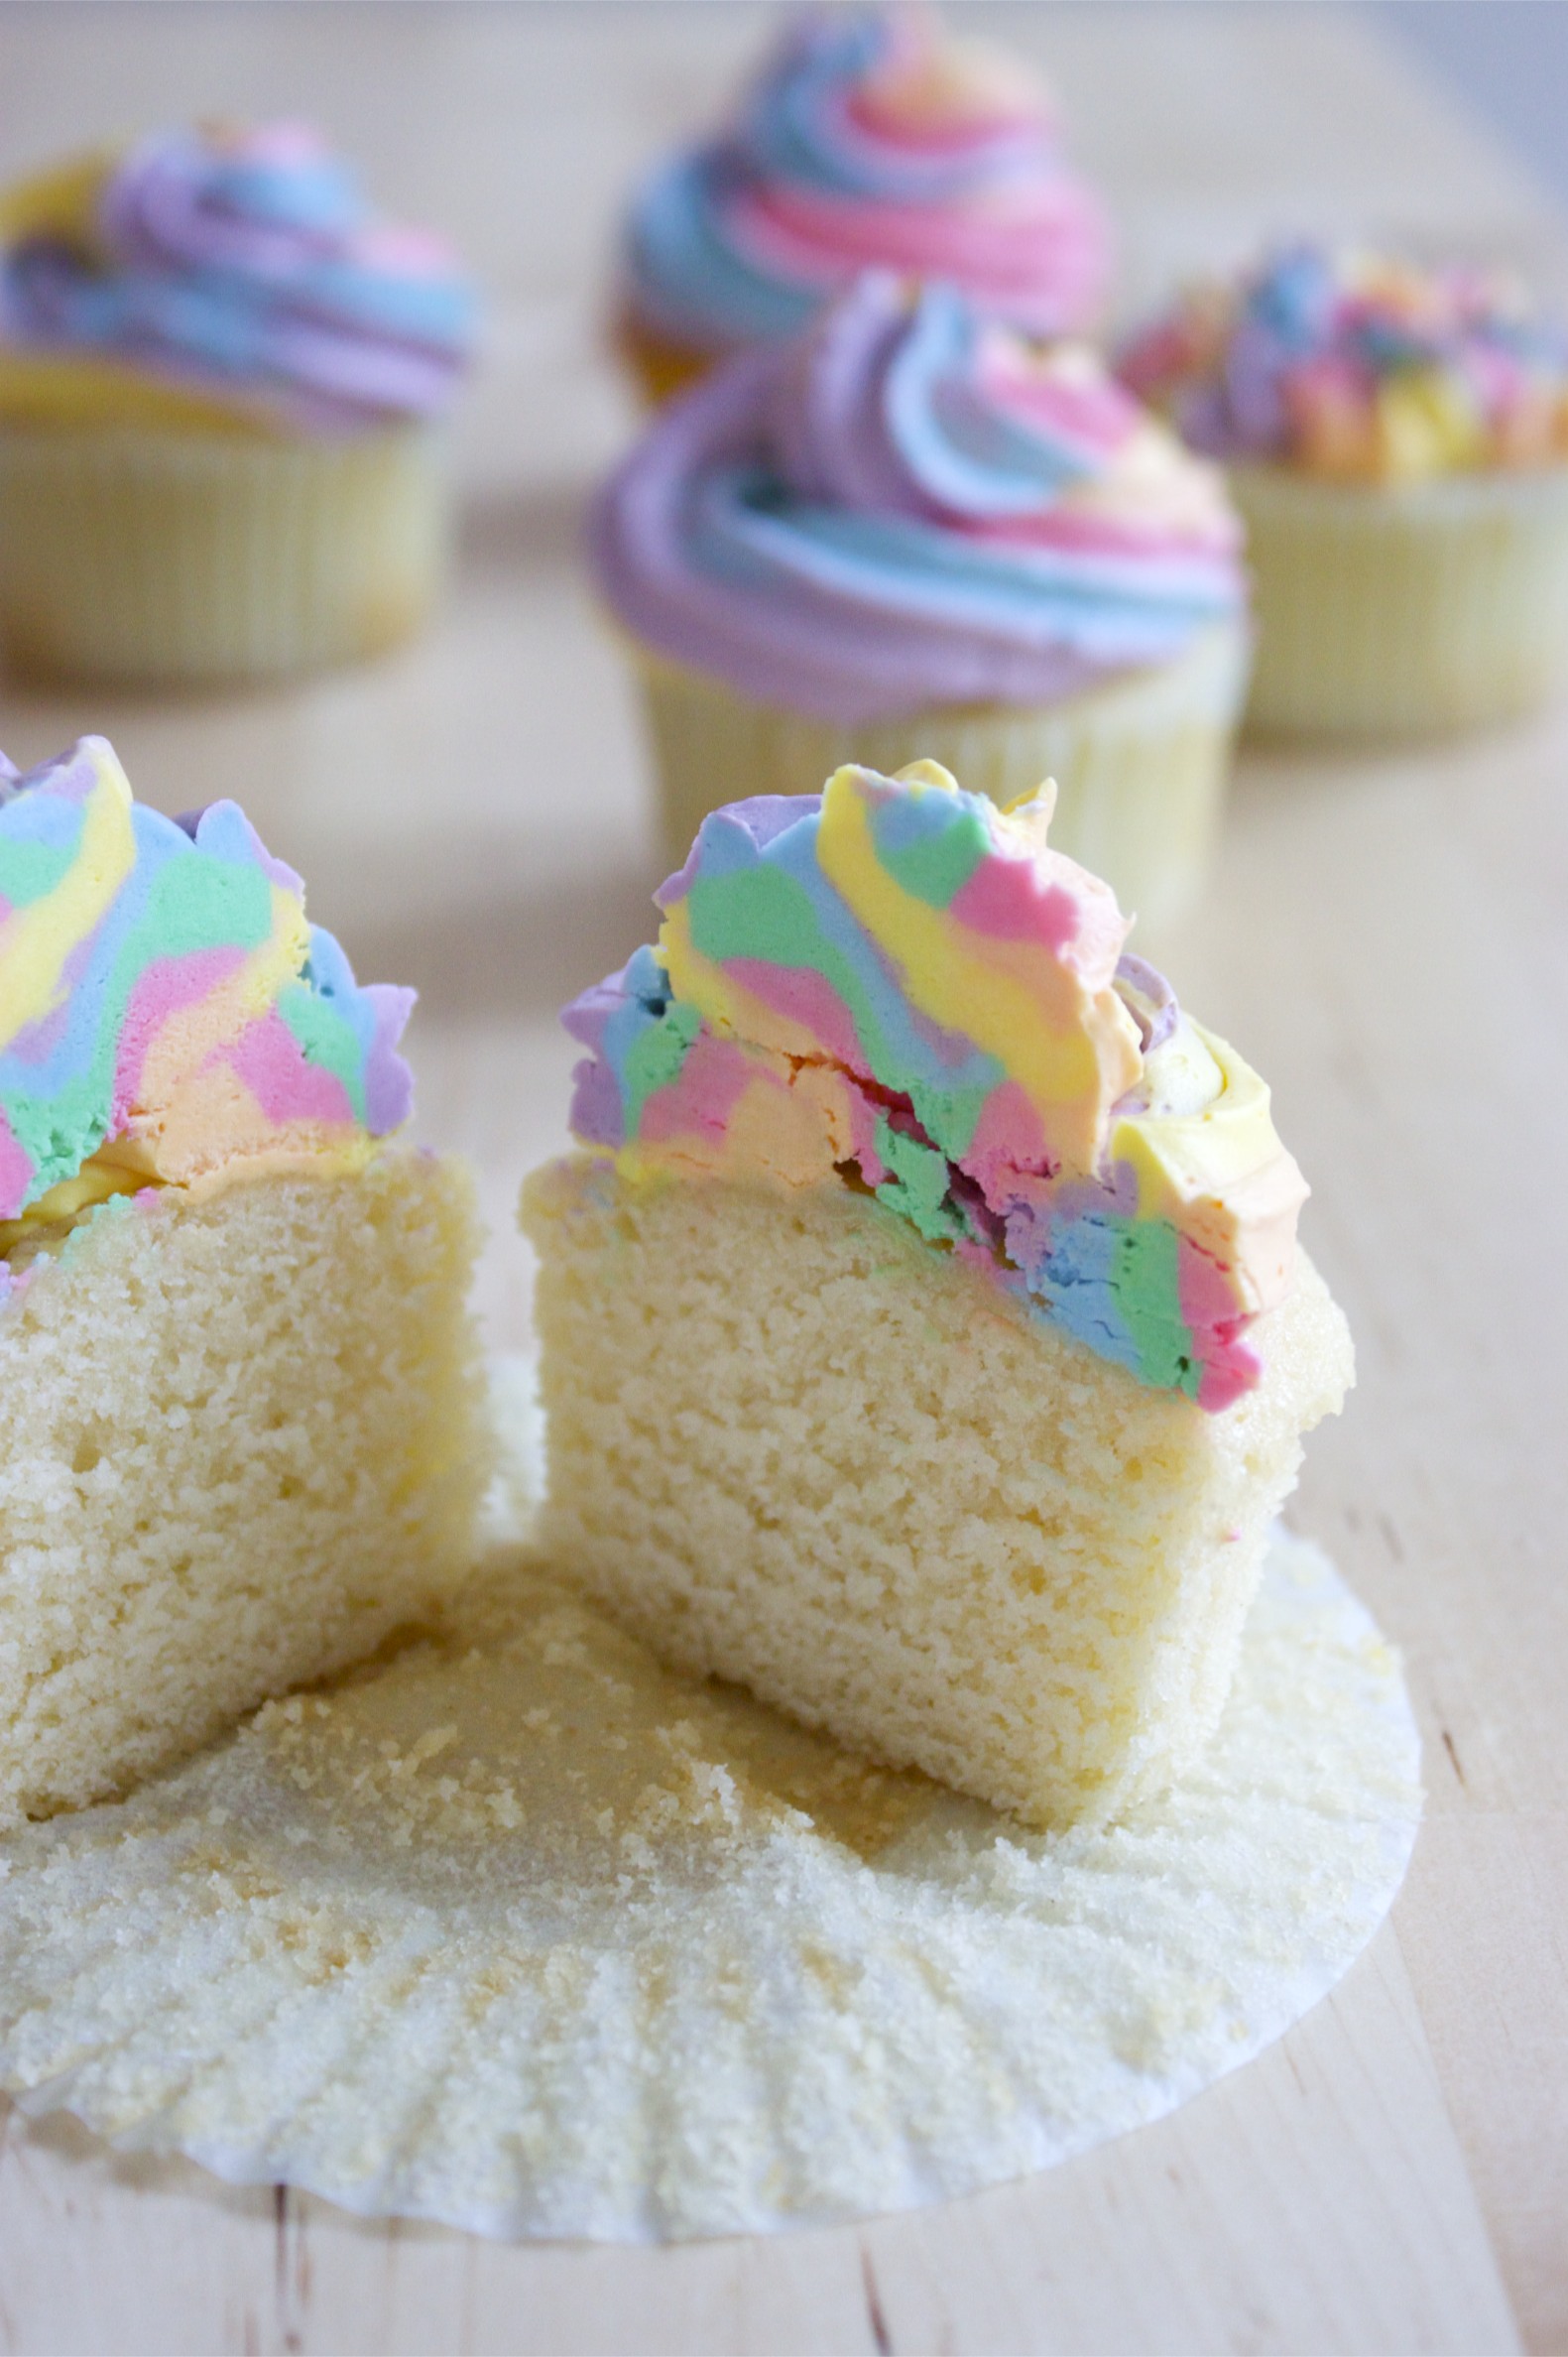
I decided to start with a classic yellow cupcake, then topped it with a whipped vanilla frosting in all the colours of the rainbow, to mimic a pot o’ gold at the end of the rainbow (or underneath the rainbow in this case). I think it would be also super fun to fill it with some lemon curd to get the whole “hidden treasure” thing going in full effect. I only had liquid food colouring on hand so my colours are pretty pastel but I’m a pastel kind of girl anyways so I was fine with that. But, you could use gel colouring to get those true eye-popping colours of the rainbow.
So, lets get started.
To make the rainbow frosting you’ll want to divide your frosting into six bowls. Color each bowl a different colour of the rainbow. I used my favourite whipped vanilla frostingbut I have to be honest, although I LOVE that frosting for layer cakes I’m not really a fan of it on cupcakes. I really like the piled high look on cupcakes but I found the frosting to be a little much in that manner. If you like buttercream frosting on cupcakes then this would probably suite you just fine, but I generally prefer a lighter frosting on my cupcakes. Next time I make these cupcakes I would probably go for a cream cheese frosting or do some sort of white chocolate buttercream. If you do want to use the buttercream I would double the whipped vanilla frosting recipe.
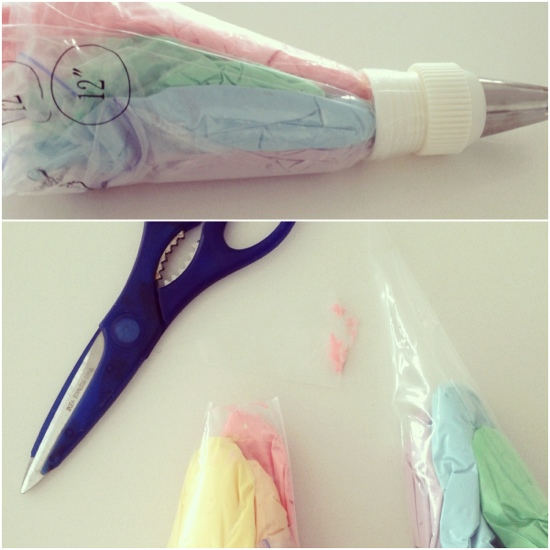
So, once your frosting is tinted as you like, spoon it into ziploc bags (I like to place the bags in a cup and drape it over the sides for easy filling). Seal the bags and cut off one corner on each one. Place three of the bags (with coinciding colours) into a large piping bag, putting them in the order they are in the rainbow. It’s important to try and make sure they are in the bag as evenly as possible or you’ll run out of one colour faster than the others. Repeat in a separate bag with the remaining three colours.
Snip off the ends of the two bags and put them together into one large piping bag fitted with a large coupler, again placing them in the colour of the rainbow. The larger the bag you can find the better. If it’s not large enough you may have to work with half of the amount of icing at a time.
Squeeze out any excess air before piping onto cupcakes. The first couple cupcakes may look a little funny until all of the colours start coming out at once. If you want you can do this on some parchment paper until you get the look you want. But I prefer to waste these types of things in my belly so we just mark those couple cupcakes as “taste tests”. I used a Ateco #827 tip to frost my cupcakes.
And, there you go, rainbow coloured frosting that the kiddies will go crazy for!
Classic Yellow Cupcakes
Serves: 24 cupcakes
Ingredients
-
- 1 cup all-purpose flour
- 2 cups cake flour
- 1 tablespoon baking powder
- 1/2 teaspoon salt
- 1 cup unsalted butter, room temperature
- 1 3/4 cups sugar
- 4 large eggs
- 2 teaspoons vanilla extract
- 1 1/4 cups milk
Instructions
- Sift together flours, baking powder and salt. Set aside.
- Beat together butter and sugar until light and fluffy. Beat in eggs, one at a time, until combined. Beat in vanilla. Beat in the flour in three additions, alternating with milk, starting and ending with flour. Do not overbeat.
- Scoop 1/4 cup batter into 24 regular sized muffin tins lined with cupcake liners. Bake at 350ºF for 20 minutes or until a toothpick inserted in the centre comes out clean. Cool for 5 minutes before removing cupcakes from pan and cooling on wire racks. Allow to cool completely before frosting.
Tip
- To make your own cake flour for this recipe, sift together 1 3/4 cups all-purpose flour with 1/4 cup cornstarch a couple of times to incorporate and fluff it up. This is equal to 2 cups of cake flour.
Cupcake recipe adapted Simple Bites, originally from Martha Stewart’s Baking Handbook.
You May Also Like