We did it! We actually made gingerbread houses from scratch. And, the most amazing part is, there was no stress involved! I totally thought there would be. We weren’t going for perfection, we were going for a fun Christmas project, so not having expectations of how they would turn out was probably the biggest reason it wasn’t stressful. And, splitting up the work over several days rather then trying to get it all done in one. So here’s a little closer look at our results, and below you will find which recipes we used and some tips we learned along the way.

Looking at our gingerbread houses it’s pretty clear that I have a girl and a boy. Alli wanted everything pink and girly. She’s two, so we worked on it together, but I made sure she got to choose her own colours and candy, and had input into where we placed everything. I think it turned out pretty cute and it suites her very well.
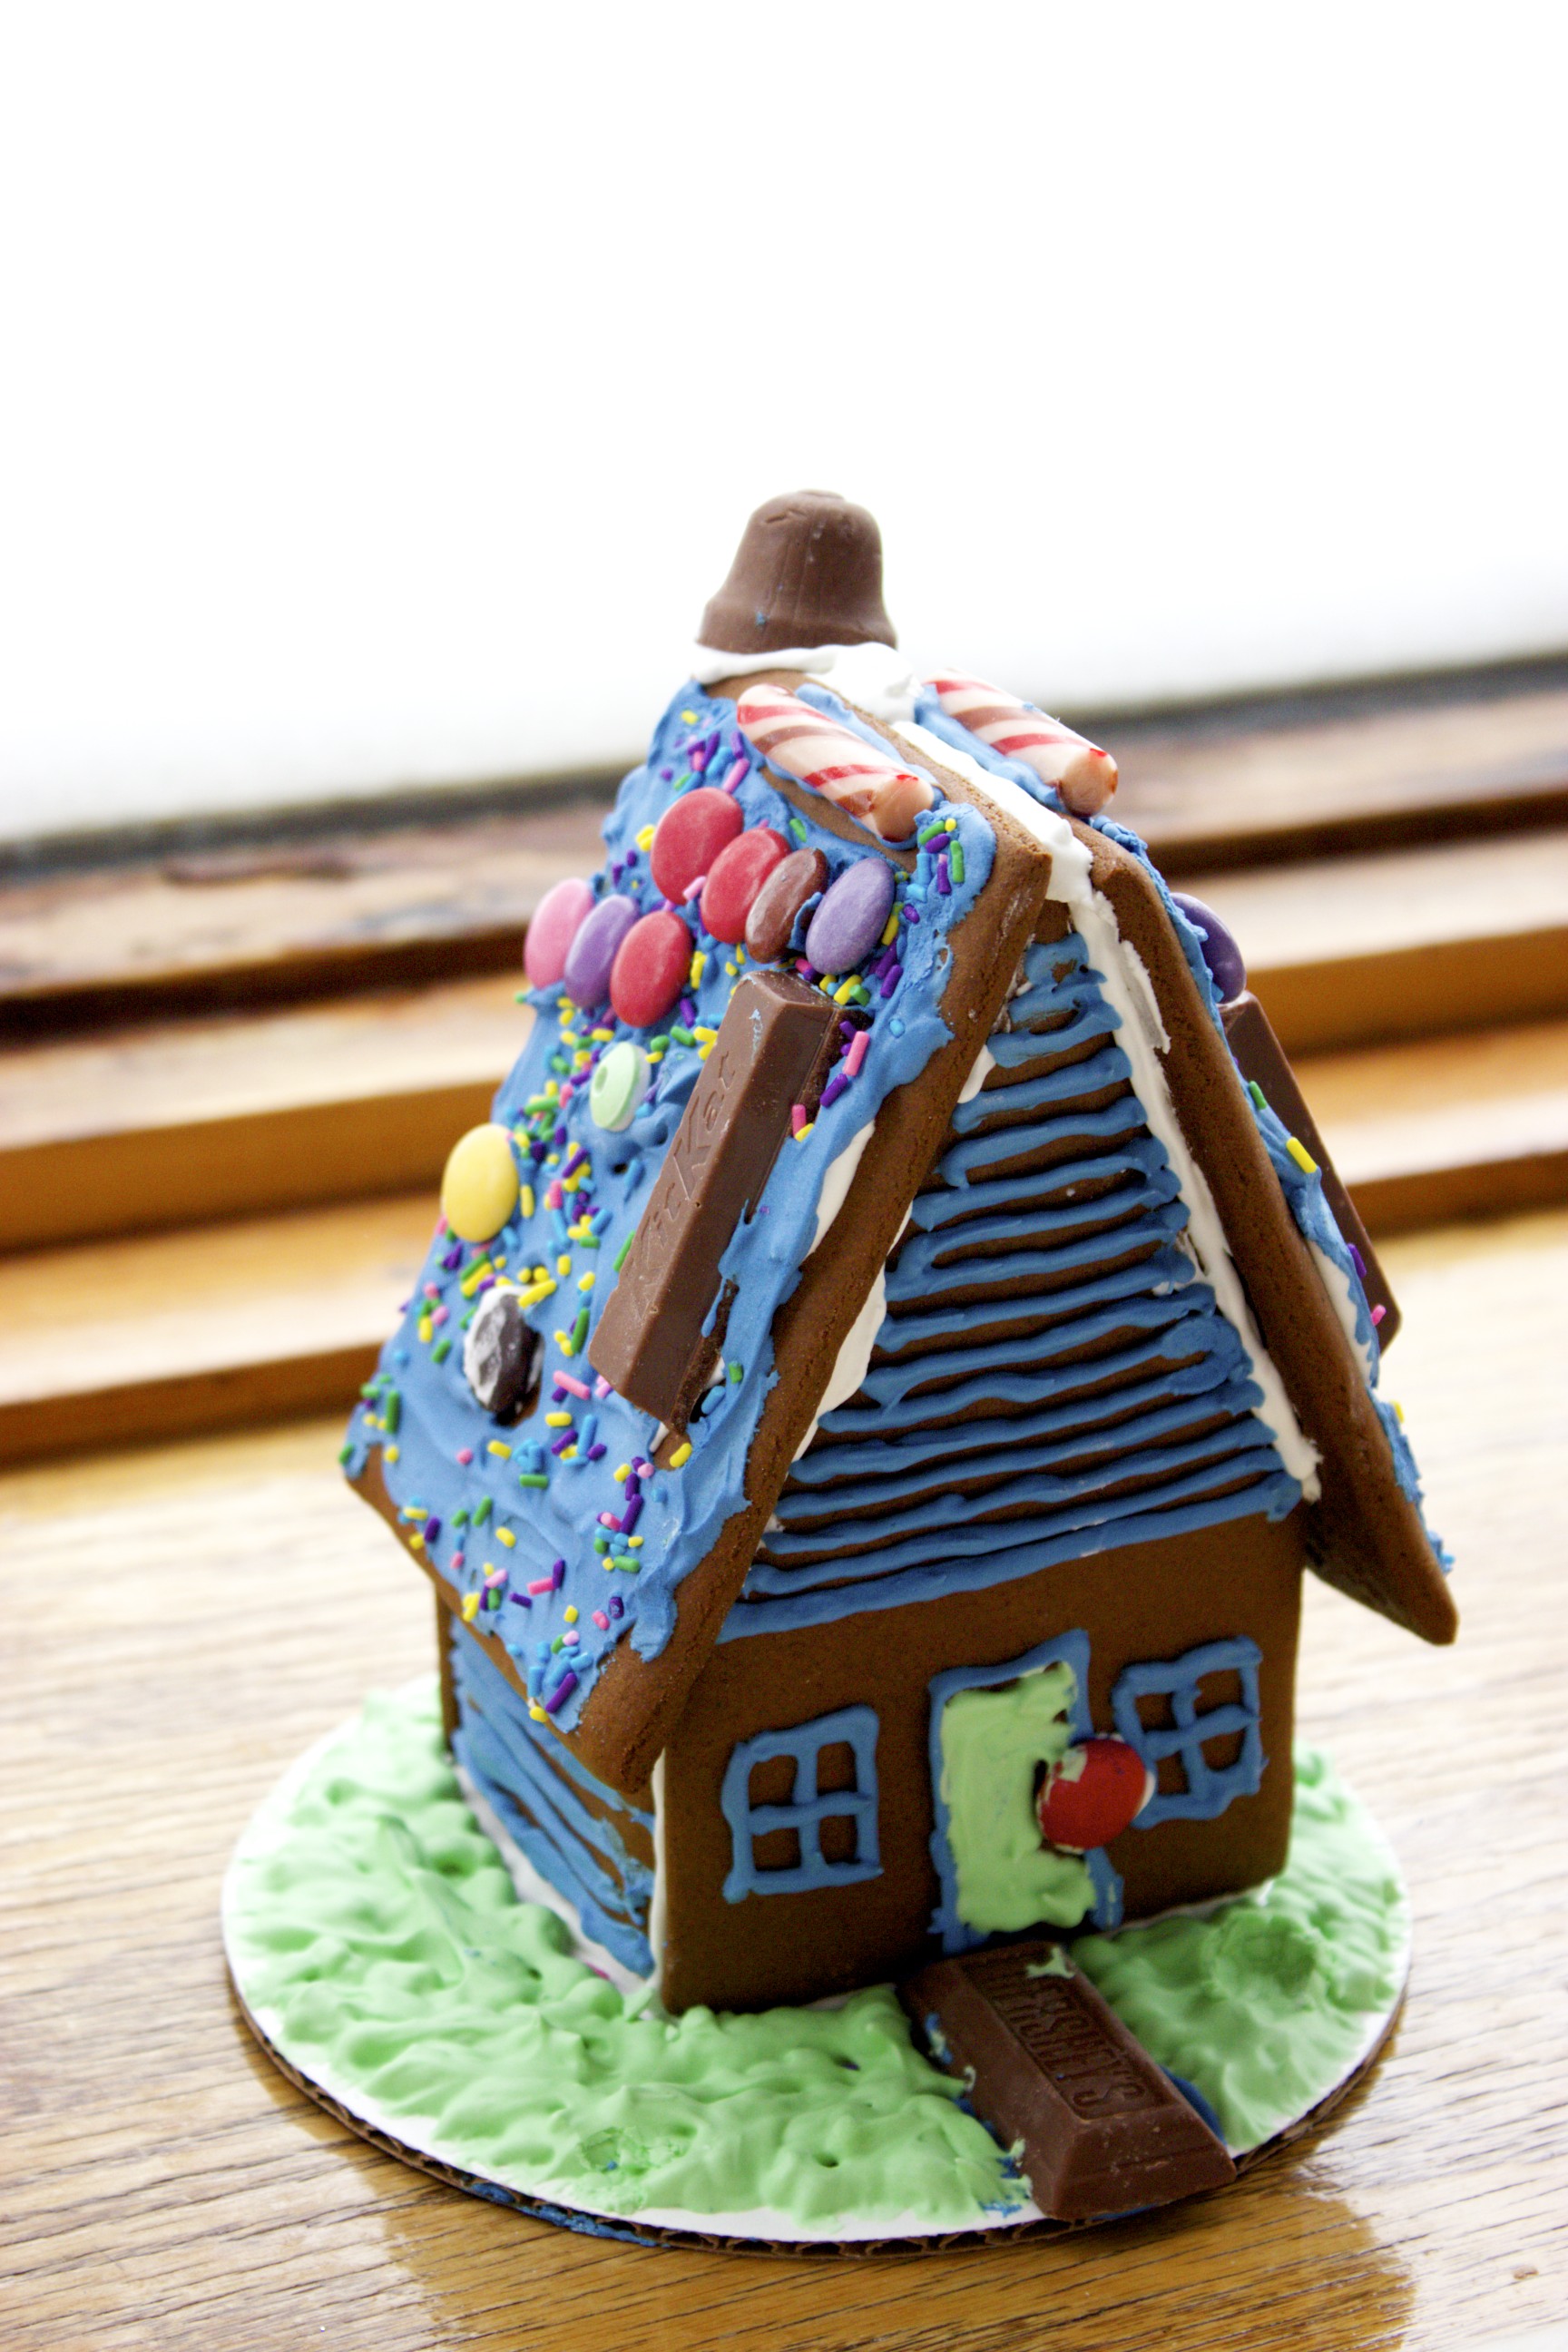
Someone was a little in denial about winter. Apparently it doesn’t snow in Police World where this gingerbread house resides. Working on this was pretty much the highlight of Max’s week, which made the whole project totally worth it!
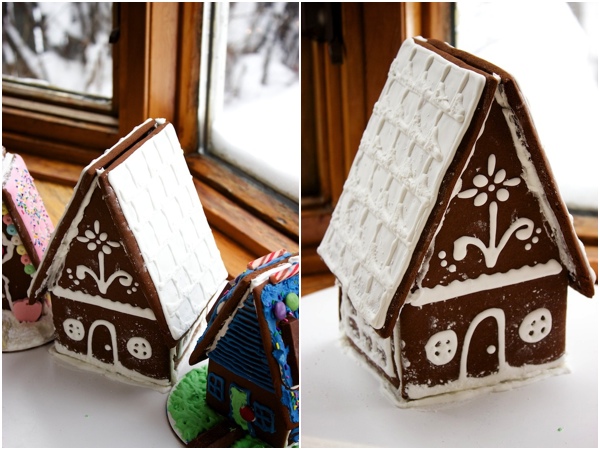
Mine was a little larger then the kids’ and I had some issues getting it to stay together when it came time to assemble. We ended up tying it together with yarn until the icing dried. While the kids decorated their gingerbread houses after we assembled them, I opted to decorate before assembly. That way I could treat them a bit more like cookies and do a bit of flooding and layering. I couldn’t find my piping tips so I wasn’t able to get as detailed as I wanted, but since this project was more for the kids, I just threw it together, when I had time, after the kids were done.
We ended up using this no-chill gingerbread dough recipe (we used butter instead of margarine), and we loved it. Many of the recipes I’ve tried in the past would not have been sturdy enough for gingerbread houses or were just generally hard to work with. This was easy to roll out, tasted delicious and was nice and sturdy without being tough. I will definitely be using it again next year!
For the icing we opted for this royal icing for gingerbread houses because we had all the ingredients on hand. Since we’re not planning on eating the houses, as they will be up for several weeks, I was not concerned about the raw egg whites.
For the decorating portion of my house and Alli’s pink roof, I thinned the frosting a bit and followed this technique shown by Annie on flooding and decorating cookies.
We used this Simple Gingerbread House template as our guide. We thought the results were pretty cute so we would definitely use it again.
Tips
- To make a smaller version of a template for your kids simply set the printer to print at 50-70% size. Next year I will probably do this for myself as well, as the kids’ were much easier to assemble and we thought it was fun to have a little village of houses rather then one large one.
- Use any scraps of leftover dough to make cookies. We like to set aside a few to decorate the tree. Simply use a straw to poke holes before baking so you can string them up.
- Split up the work between a few days. Aimée has a great series on building your gingerbread house in stages throughout the week, including recipes and tips. This keeps things simple and stress-free.
- If you plan on getting artsy, sketch out your designs ahead of time on a printable version of the gingerbread house. This way you can see how it looks before you start to pipe.
- While you’re working, keep the tip of your piping bag covered with a damp cloth to keep it from drying out. This time around we just used ziploc bags with a little snip off of one corner for piping.
Have you made a gingerbread house? I’d love to see a pic or hear your tips!
You May Also Like