KS
Kitchen Simplicity
Recipes
Freelance
Category
Candy
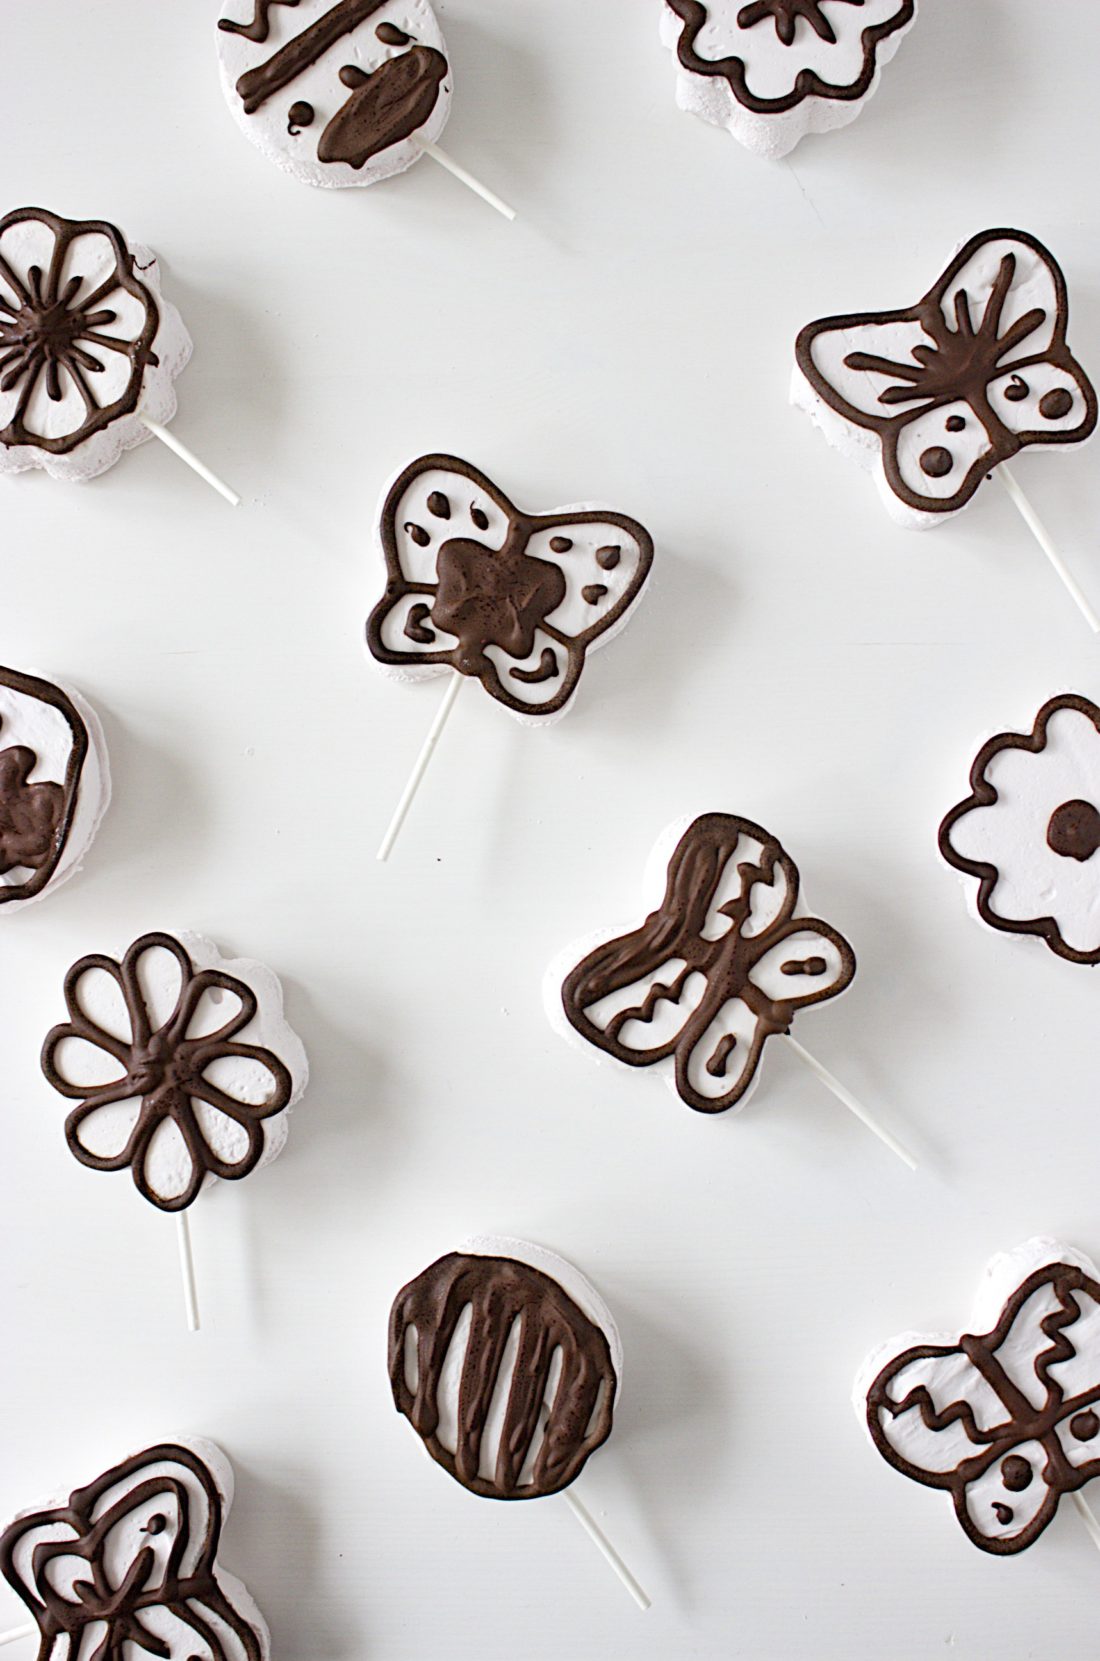
Chocolate Dipped Marshmallow Pops
read more
Easy Peppermint Truffles & Instant Hot Chocolate (dairy and processed-sugar free)
read more
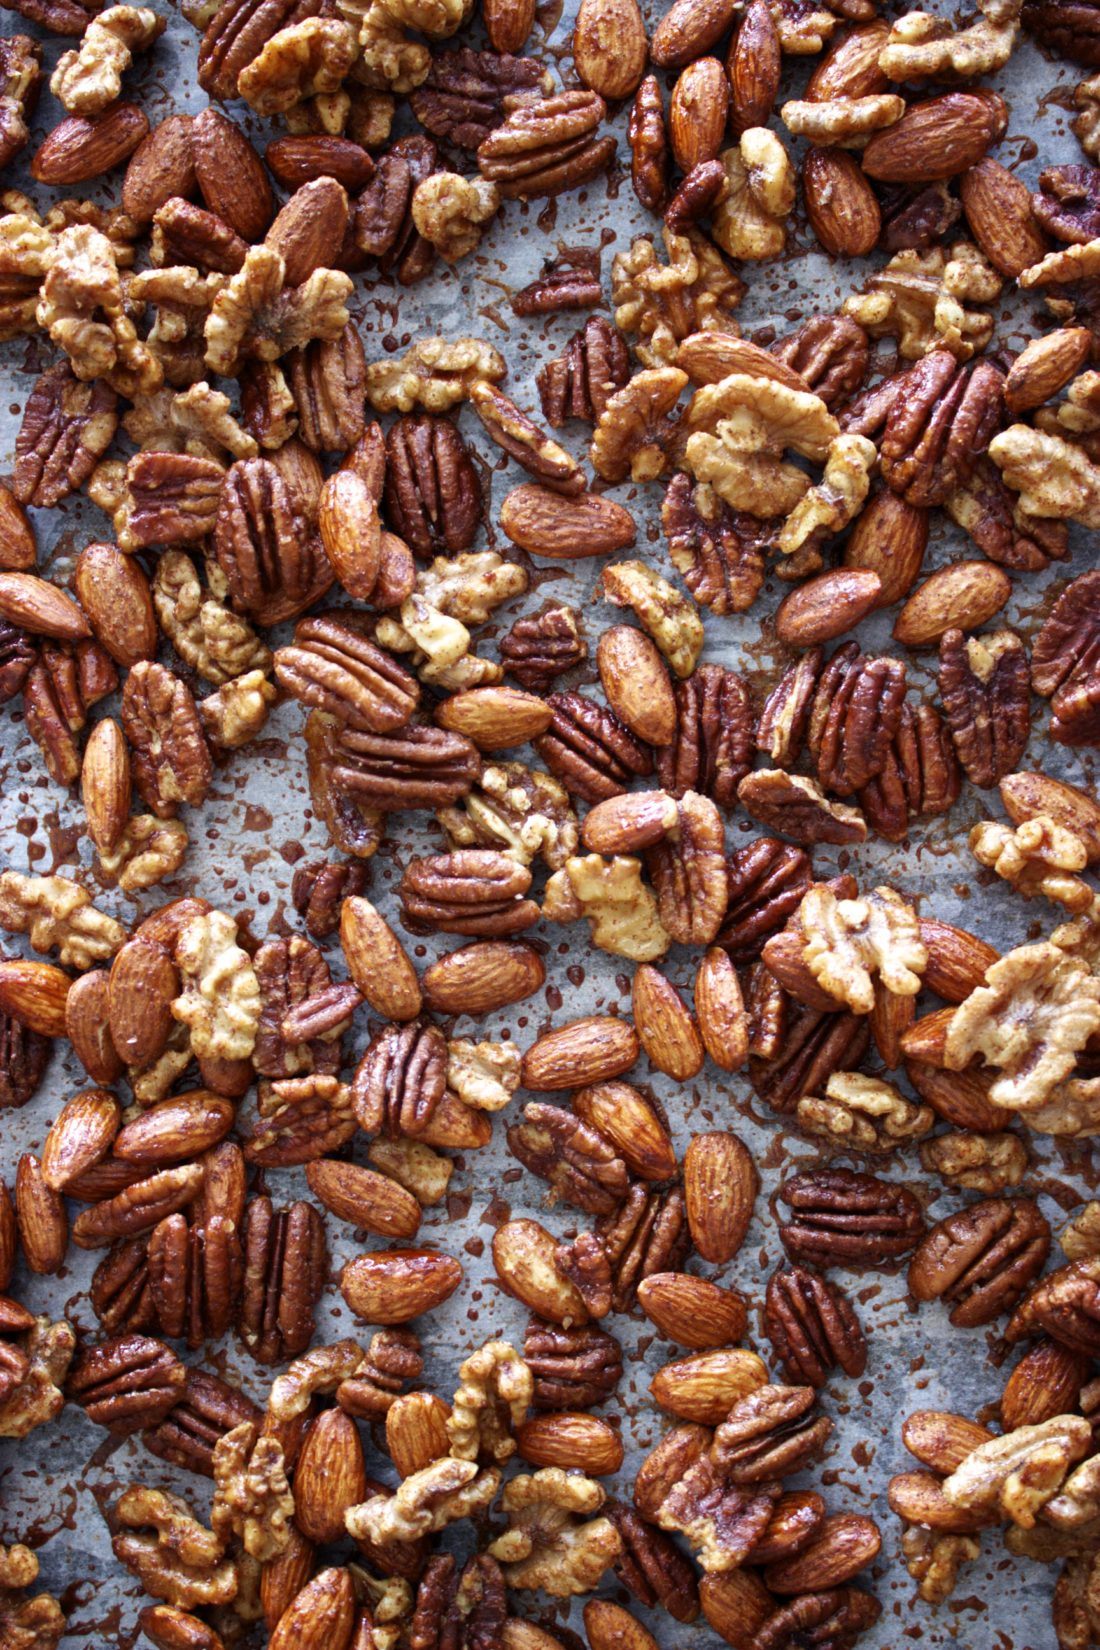
Maple Spiced Candied Nuts
read more
Three No-Bake Easter Treats
read more
Barcelona Hot Chocolate with Strawberry Marshmallows
read more